Building the video assets of the album “Night at the opera”
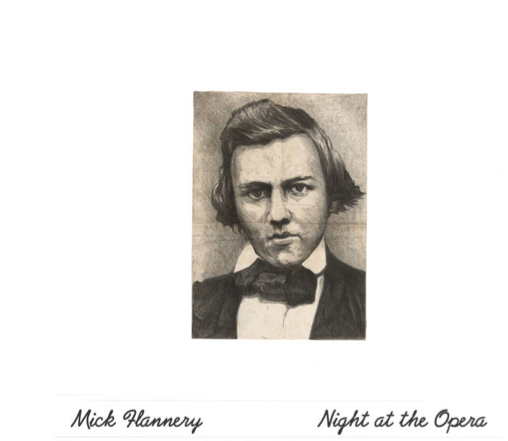
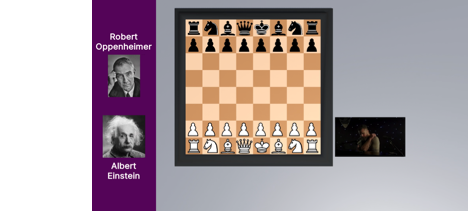
Mick Flannery is a musician and singer, often at the top of the charts in Ireland. Since 2008, he has released 10 albums, and this week (February 2022) he is releasing the 11th album named “Night at the Opera”. For full disclosure… Mick is Sarah’s brother.
Back in April 2021, Mick started to explain his vision for his latest album, a set of 12 music videos centered on chess. He set himself a songwriting challenge to create songs around famous historical chess games where the piece moves dictate the bass notes of the song. The music in turn would drive the timing of chess games.
Here is a recent video of Mick explaining how he thought of this:
Sarah and I decided that we would build the videos using and we organized ourselves to divide and conquer the project: Sarah would generate the data representative of the games, converting the PGN chess code, the MIDI data from the songs’ bass tracks, into a C# data structure, that I would then use to animate the pieces, and I would create a scene, with a 3D chess board, and a keyboard showing the notes, maybe a video of Mick.
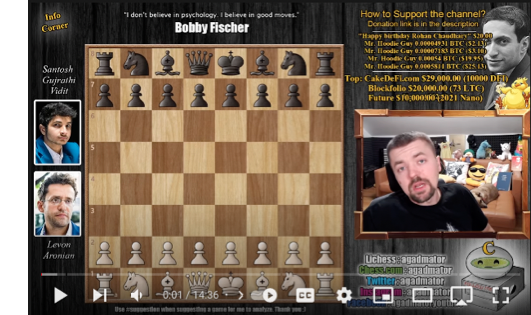
We were inspired by agadmator’s Chess Channel on YouTube, which we started to watch regularly.
How hard can this be?
I started by coding the game in Unity, using c# and the monobehavior class, but then realized that debugging the videos that way would be gnarly. if you see a glitch, or something wrong, how do you get back to it easily?
Of course that’s what the Timeline package in Unity is for, so I switch the logic to an Editor Script, and started to build the Timeline data from the C# data that Sarah was providing. We set up the project on our Plastic SCM version control server, and started coding…
Sarah started to look at the data:
The PGN chess code is a text file which includes the moves in chess notation:
2. Nf3 Nc6
3. Bb5 a6
4. Ba4 b5
5. ...
Sarah found a Python script that converts the PGN moves into a CSV spreadsheet, which she then reads in Mathematica. By that time we also got the Midi files from Mick, and by Sarah merged the midi data with the CSV information to generate a data structure like this:
{
new moveInfo {note = "C3" , when = 7.66354 f, duration = 1.09688 f, move = "e4", from = "e2", to = "e4", whiteMove = true, piece = "Pawn E White"},
new moveInfo {note = "C3" , when = 9.16458 f, duration = 0.855208 f, move = "e5", from = "e7", to = "e5", whiteMove = false, piece = "Pawn E Black"},
new moveInfo {note = "D3" , when = 10.6208 f, duration = 0.989583 f, move = "Nf3", from = "g1", to = "f3", whiteMove = true, piece = "King Knight White"},
new moveInfo {note = "D3" , when = 12.151 f, duration = 0.745833 f, move = "Nc6", from = "b8", to = "c6", whiteMove = false, piece = "Queen Knight Black"},
...
She also generated other datastructures for the meta data, what colors to assign to what notes and data for populating the legends, title screen and credit screens etc.
Meanwhile, I started to work on the 2D/3D scene. The 2D scene is really a 3D scene with a proper isometric camera.
I purchased some assets from the Unity Asset Store, and from TurboSquid, and started to put something together.
From our experience working with björk and M&M on Biophilia, I knew that it was important to get Mick, who was directing the video, to see imagery as quickly as possible. Show him a lot of variations, so we could then let him direct within the possible space. It was his baby, he had to make the fin choices, but I had to show what was possible…
The first screen looked like this :
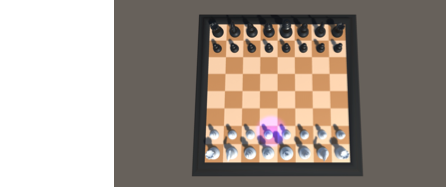
And using Sarah first data, it quickly started to animate like this. I started to use the recorder package to generate the video.
Mick’s feedback was that he was not sure the 3D would work. and he wanted to test 2D. So we made the first 2D version. I started to play with UI Toolkit in Unity to do the layout.
I also thought that it would be a good idea to have Mick’s video playing the song. Everyone likes to see Mick playing…
At that stage I started to spend a lot of time getting the video playing and trying to do the recording properly. I was failing to get it working with the default packages, so I got a video player asset from the asset store…
It worked very well, but synchronizing the midi with the audio was a challenge (we learned much later why…). Every song had a different starting point, and Sarah had to add a human measured value per song. this was quite frustrating and went on for a long time… with little improvements.
However Mick never liked the idea of him being in the video as a video stream… so maybe this was not the right problem to solve
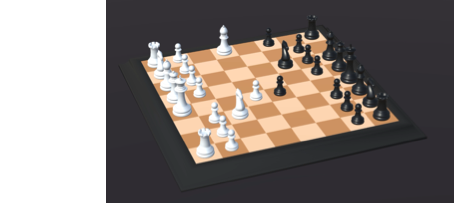
We all got distracted by other things for a few months, until December, when Mick announced he was planning to release the album soon. He had new ideas also on what it could look like, and wanted to look at a 3D chess set again. I went to TurboSquid, got a better chess set (with wood materials), converted it properly in Blender, and added a table (a unity cube really). It looked like this:
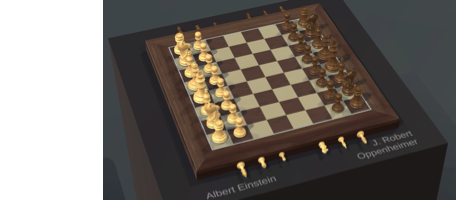
Which is very close to the final look.
The big change that happened at that time, apart from switching to 3D, was the realization, that with 12 videos to work on, and the challenges of getting things synchronized, debugging in runtime was going to be tough. I decided to switch to the use of Timeline. I moved my runtime scripts into editor scripts, and assembled an environment where I could select a song from a menu, and set everything to be playable.
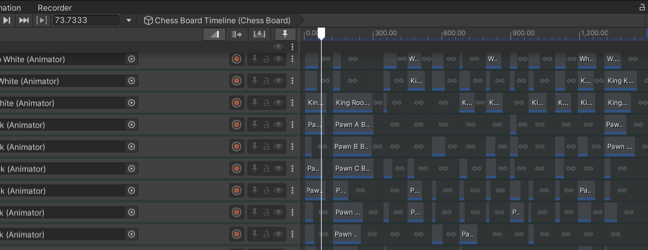
Quickly I learned to set it up so that everything that was variable in the scene was being reset by the timeline itself, so I could in fact add the 12 songs in the timeline, press play and record all 12 songs!!! ( in ~30 minutes)
Below you will see that I am sharing a lot of code. It turns out that the documentation for building Timeline through scripting is lacking examples, and so I hope that all of this will turn out to be useful to some of the Unity Developers who are attempting similar projects.
This was a life saver. Maybe even a marriage saver, as I had to re-record everything dozens of times…. Automation is key. Let’s the computer do the job (like they say at Skynet…). For example I have a mono behavior to get out of playmode after the timeline is finished…
{
EditorApplication.ExecuteMenuItem(“Edit/Play”);
}
Let me mention some of the high level things I learned about Timeline in the process of scripting it. The Unity documentation is lacking in examples, and I will share quite a bit of code here to help others. ( If you don’t intend to program something like this, please skip past the code segments to the next general section named NFTs.
The Scripting code for the creation of the videos
Here is what the main loop of the script does:
1- iterating on a game, I would prepare a data structure with all the information I would need about the animations, UI, Audio, etc… (local positions, local rotations if needed, color for material, text for UI, all with timestamp and value)
2- I would then iterate through the data and create tracks (if they are not created yet)
3- in each track I would create a timeline clip
4- from the clip I get a specific clip depending on what we are animating (position, text mesh pro, recorder..)
5- I add the data as curves to the clip
6- I save the asset database data for that clip, if the data is not serialized into the clip. otherwise it disappears when going into playmode.
I organized the tracks in track groups. it makes it easier to find what you are looking for. Also the script starts by deleting any track in a recognize track group. So I can add tracks manually, and not have they destroyed by the script, and then migrate to have them built automatically.
Of course, the script starts by finding the timeline:
gameBoard = GameObject.Find(“Chess Board”);
pd = gameBoard.GetComponent();
timelineAsset = pd.playableAsset as TimelineAsset;
The loop that deletes the programmed tracks: (TODO: change to a switch statement)
First collect the groups the code is aware of…
{
GroupTrack gt = t as GroupTrack;
if (gt != null)
{
// Debug.Log(“found GroupTrack named = “+gt.name);
if (gt.name == “Music”)
musicParentTrack = gt;
if (gt.name == “Piece moves”)
{
parentGroup = gt;
}
...
Then delete the Timeclips of the track completely at will:
{
// AnimationTrack at = t as AnimationTrack;
if (at != null) {
// Debug.Log ("found AnimationTrack named = " + at.name);
if (at.parent == musicParentTrack && at.hasClips) {
foreach (TimelineClip clip in at.GetClips ()) {at.DeleteClip (clip);}}
if (at.parent == parentGroup) timelineAsset.DeleteTrack (at);
...
Here is what the code look like for updating the Audio (These tracks were never deleted)
{
UnityEngine.Timeline.AudioTrack at = t as UnityEngine.Timeline.AudioTrack;
if (at != null)
{
if (at.name == “Actual song”)
{
AudioClip clip = AssetDatabase.LoadAssetAtPath(SelectedSongData.audio_FileName);
if (clip != null)
{
clip.name = SelectedSongData.audio_FileName;
TimelineClip tc = at.CreateClip(clip);
tc.duration = clip.length;
tc.displayName = SelectedSongData.outputFileName;
tc.clipIn = SelectedSongData.audioClipIn;
tc.start = SelectedSongData.audioStart+introScreenDelay + clipInsertionTime + audio_delta;
}
else
{
Debug.Log(“Failed to load audio file:” + SelectedSongData.audio_FileName);
}
}
}
}
Here is what the code look like for moving pieces (translation and rotation). The king can be toppled for example.
Notice that the clip needs to be saved. otherwise it will be released when you press the “Play” button.
if (!tracks.ContainsKey(pieceName))
{
tracks[pieceName] = timelineAsset.CreateTrack(parentGroup, pieceName);
pd.SetGenericBinding(tracks[pieceName] , piece[pieceName].GetComponent());
}
newTrack = tracks[pieceName];
AnimationClip clip = new AnimationClip();
clip.name = pieceName + “ - “ + SelectedSongData.outputFileName;
clip.legacy = false;
AnimationCurve Xcurve = new AnimationCurve(Xkeys);
AnimationCurve Ycurve = new AnimationCurve(Ykeys);
AnimationCurve Zcurve = new AnimationCurve(Zkeys);
AnimationCurve RXcurve = new AnimationCurve(RXkeys);
AnimationCurve RYcurve = new AnimationCurve(RYkeys);
AnimationCurve RZcurve = new AnimationCurve(RZkeys);
clip.SetCurve(“”, typeof(Transform), “localPosition.x”, Xcurve);
clip.SetCurve(“”, typeof(Transform), “localPosition.y”, Ycurve);
clip.SetCurve(“”, typeof(Transform), “localPosition.z”, Zcurve);
clip.SetCurve(“”, typeof(Transform), “localEulerAnglesRaw.x”, RXcurve);
clip.SetCurve(“”, typeof(Transform), “localEulerAnglesRaw.y”, RYcurve);
clip.SetCurve(“”, typeof(Transform), “localEulerAnglesRaw.z”, RZcurve);
TimelineClip tClip = newTrack.CreateClip(clip);
tClip.start = clipInsertionTime;
AnimationPlayableAsset animationPlayableAsset = tClip.asset as AnimationPlayableAsset;
animationPlayableAsset.removeStartOffset = false;
AssetDatabase.CreateAsset(clip, “Assets/Anims/” + clip.name + “.anim”);
Here is what the code looks like for materials. very similar
if (!tracks.ContainsKey(stringname))
{
tracks[stringname] = timelineAsset.CreateTrack(parentGroup, stringname);
pd.SetGenericBinding(tracks[stringname], s.Value.GetComponent()); //Attach to object
}
newTrack = tracks[stringname];
AnimationClip clip = new AnimationClip();
clip.name = stringname + “ - “ + SelectedSongData.outputFileName;
clip.SetCurve(“”, typeof(MeshRenderer), “material._Color.r”, Rcurve);
clip.SetCurve(“”, typeof(MeshRenderer), “material._Color.g”, Gcurve);
clip.SetCurve(“”, typeof(MeshRenderer), “material._Color.b”, Bcurve);
clip.SetCurve(“”, typeof(MeshRenderer), “material._Color.a”, Acurve);
TimelineClip tClip = newTrack.CreateClip(clip);
tClip.start = clipInsertionTime;
AnimationPlayableAsset animationPlayableAsset = tClip.asset as AnimationPlayableAsset;
animationPlayableAsset.removeStartOffset = false;
AssetDatabase.CreateAsset(clip, “Assets/Anims/” + clip.name + “.anim”);
Here is what the code looks like for recorder
{
recorderTracks[“Recorder Track”] = timelineAsset.CreateTrack(recordingParentTrack, “Recorder Track”);
}
RecorderTrack Track = recorderTracks[“Recorder Track”];
if (Track != null)
{
TimelineClip Clip = Track.CreateClip(); // like Bruno
Clip.displayName = SelectedSongData.outputFileName;
Clip.duration = isShortVideo?(15.0f):SelectedSongData.recordingEnd+introScreenDelay+introFadeDelay+endGamePauseDelay+creditFadeDelay+creditScreenDelay;
Clip.start = clipInsertionTime;
var recorderSettings = ScriptableObject.CreateInstance();
recorderSettings.name = “Movie Recorder”;
recorderSettings.OutputFormat = MovieRecorderSettings.VideoRecorderOutputFormat.MP4;
recorderSettings.Enabled = true;
recorderSettings.VideoBitRateMode = VideoBitrateMode.High;
recorderSettings.CaptureAlpha = false;
recorderSettings.ImageInputSettings = new GameViewInputSettings() {
OutputWidth = 1920,
OutputHeight = 1080,
RecordTransparency = false
};
recorderSettings.AudioInputSettings.PreserveAudio = true;
recorderSettings.OutputFile = SelectedSongData.outputFileName; // Change this to change the output file name (no extension)
recorderSettings.FileNameGenerator.Leaf = “Recordings”;
recorderSettings.FileNameGenerator.Root = 0;
recorderSettings.FileNameGenerator.FileName = SelectedSongData.outputFileName;
recorderSettings.EndTime = isShortVideo?(15.0f):(SelectedSongData.recordingEnd+introScreenDelay+endGamePauseDelay+introFadeDelay+creditFadeDelay+creditScreenDelay);
var recorderClip = (RecorderClip)Clip.asset;
recorderClip.settings = recorderSettings;
AssetDatabase.AddObjectToAsset(recorderClip.settings, recorderClip); // <------ THIS! create settings in local asset
RecorderOptions.VerboseMode = false;
Here is what the code looks like for TextMeshPro. The clip does not need to be saved in the asset database, because it is serialized in the timeline data.
{
TMPtracks[objectName] = timelineAsset.CreateTrack(uiParentTrack, objectName);
pd.SetGenericBinding(TMPtracks[objectName], s.Value.GetComponent());
}
TMPTextSwitcherTrack newTrack = TMPtracks[objectName];
TimelineClip tClip = newTrack.CreateDefaultClip();
TMPTextSwitcherClip clip = tClip.asset as TMPTextSwitcherClip;
tClip.start = clipInsertionTime ;
tClip.duration = introScreenDelay + introFadeDelay + SelectedSongData.recordingEnd + endGamePauseDelay +
creditFadeDelay + creditScreenDelay;
string str = “”;
float size = 36;
Color color = Color.gray;
// add extra code to figure the string you need.
str = ...;
clip.template.text = str;
clip.template.fontSize = size;
clip.template.color = color;
clip.name = objectName + “ - “ + SelectedSongData.outputFileName;
Here is what the code looks like for Cinemachine. Lots of code here, this sets (potentially) 3 clips which overlap to get a nice camera transition.
if (!cinemachineTracks.ContainsKey(“Main Camera”))
{
cinemachineTracks[“Main Camera”] = timelineAsset.CreateTrack(cameraParentTrack, “Main Camera”);
cTrack = cinemachineTracks[“Main Camera”];
pd.SetGenericBinding(cTrack, mainCamera.GetComponent());
}
cTrack = cinemachineTracks[“Main Camera”];
float cameraStart = 0;
float cameraDuration = SelectedSongData.recordingEnd + introScreenDelay + introFadeDelay +
endGamePauseDelay +
creditFadeDelay + creditScreenDelay ;
if (SelectedSongData.finalZoomOnPiece.Length > 0)
{
float lastmoveTime = introScreenDelay + introFadeDelay + selectedMoves[selectedMoves.Count-1].when;
TimelineClip tClip = cTrack.CreateClip();
string cameraPieceName = SelectedSongData.finalZoomOnPiece;
tClip.start = clipInsertionTime + lastmoveTime-5f ;
tClip.duration = cameraDuration - creditFadeDelay - creditScreenDelay - (lastmoveTime-5f) ; // shorter
var shot = tClip.asset as CinemachineShot;
shot.name = “shot Follow “+cameraPieceName+“ Camera “ + SelectedSongData.outputFileName;
shot.VirtualCamera.exposedName = shot.name;
pd.SetReferenceValue(shot.VirtualCamera.exposedName,
GameObject.Find(“CM Follow “+cameraPieceName+“ Camera”).GetComponent());
TimelineClip tClip3 = cTrack.CreateClip();
tClip3.start = clipInsertionTime + cameraDuration - creditFadeDelay - creditScreenDelay - 3; ;
tClip3.duration = 3 + creditFadeDelay + creditScreenDelay ; // shorter
shot = tClip3.asset as CinemachineShot;
shot.name = “shot Follow “+cameraPieceName+“ Camera “ + SelectedSongData.outputFileName+“ to credits”;
shot.VirtualCamera.exposedName = shot.name;
pd.SetReferenceValue(shot.VirtualCamera.exposedName,
GameObject.Find(“CM Follow “+cameraPieceName+“ Camera End”).GetComponent());
//AssetDatabase.CreateAsset(shot, “Assets/Anims/”+shot.name+“.shot”);
cameraDuration = lastmoveTime - 5f + 9f;
}
TimelineClip tClip2 = cTrack.CreateClip();
tClip2.start = clipInsertionTime + cameraStart ;
tClip2.duration = cameraDuration ;
var mainShot = tClip2.asset as CinemachineShot;
mainShot.name = “shot Main Camera “ + SelectedSongData.outputFileName;
mainShot.VirtualCamera.exposedName = mainShot.name;
pd.SetReferenceValue(mainShot.VirtualCamera.exposedName,
GameObject.Find(“CM Main Camera”).GetComponent());
and then make sure you save everything:
Did I mention we have been using Mathematica extensively through the project? 🙂
I like automation, and usually leverage Mathematica’s ability to help with the pipeline.
Here is the Mathematica code that made smaller versions of the video by taking the first 10 seconds and saving them in another folder:
SetDirectory[
FileNameJoin[{ParentDirectory[NotebookDirectory[]], "Recordings"}] ];
shortFolderName = "Shorted Versions";
longFolderName = "Full Length Versions";
allLongMP4s = FileNames["*.mp4", longFolderName, Infinity];
allFilePairs = ({StringReplace[#,
longFolderName -> shortFolderName], #}) & /@ allLongMP4s;

updateFrom[dest_, src_] := Module[{},
If[ FileDate[src] > FileDate[dest],
Export[dest, VideoTrim[Import[ src ], 10]]
]
];

updateFrom @@@ allFilePairs
Here is the code that build thumbnails by taking the frame at -1 seconds or -10 second from the end. This requires Mathematica Version 13.
SetDirectory[
FileNameJoin[{ParentDirectory[NotebookDirectory[]], "Recordings"}] ];
shortFolderName = "Shorted Versions";
longFolderName = "Full Length Versions";
allLongMP4s = Join[
FileNames["*.mp4", longFolderName, Infinity],
FileNames["*.mp4", shortFolderName, Infinity]
];
AddTitle[image_, songName_] := Overlay[{image, Style[Panel[
Column[{
Style[songName, 40, White], Style["", 60],
Style["by Mick Flannery", 30, White],
Style["© 2022", 20, White]
}, Alignment -> Center]],
Background -> Directive[Opacity[.5], Gray] ]

}, Alignment -> Center]
updateThumbnail[src_, override_ : False] :=
Module[{dest, songName, extractTime = -10},
dest = StringReplace[src, ".mp4" -> "_thumbnail.jpg"];
If[ override || ! FileExistsQ[dest] ||
FileDate[src] > FileDate[dest],
songName = StringReplace[Last[FileNameSplit[src]], ".mp4" -> ""];
If[StringContainsQ[src, "Shorted Versions"], extractTime = -1];
Export[dest,
AddTitle[
ImageResize[
VideoExtractFrames[Import[ src ], extractTime], {640}],
songName]]
]
];

updateThumbnail[#, False] & /@ allLongMP4s
I will let Sarah share the tools she built to construct C# code.
NFTs !!!
As we were building this, Mick and his team started to think about using the Videos as NFTs in a marketplace. The idea was to make a few “prints” of the videos of each song, with a few variations per video: 2 2D versions, a color and a grey version, and 2 3D versions, one showing Mick’s concept of the chessboard as an instrument, and the other a more classic board.
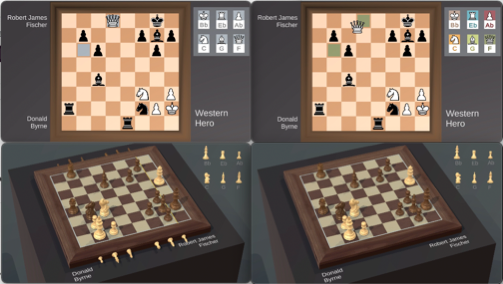
Above are snapshot of the 4 versions of the song, Western Hero . The 2D color version helps you connect the bass note with the synchronized move. In the 3D version, where the board is an instrument, the string corresponding to the note becomes visible across the board.
I will also let Sarah explain the NFT related challenges in her own post, enough to say that she had to generate over a thousand videos to upload, building tools to control Google Drive API from Mathematica, so we could upload everything efficiently and quickly, and generate the copies remotely. Hopefully she will share some links to the sample versions of the videos…
I hope you enjoyed reading this…
Cheers,
Luc